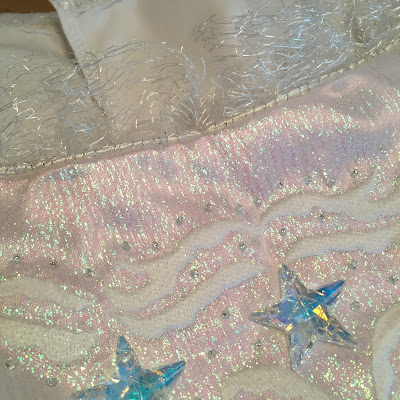
I used strips of satin (cut on the bias) and the spider mesh and pinned cord in the middle. I would highly recommend buying a piping foot for your machine - a genius little contraption! After stitching the cord into the piping, I hand stitched silver thread along the entire strip. This was placed between the centre panel and the side front panels. I then stitched together the other bodice pieces and pressed the seams as normal.
Before
After
I then cut a long strip of spider mesh and heated the edges on one side with a lighter (be careful!). This was gathered and attached to the top of the centre panel. You can also see the detail of the piping here, which was also added to the top edge of the centre too.
I cut large sections of spider mesh for the flounces. Again, the edges were burned and then gathered and pinned between the sleeve and sleeve lining. Everything was pressed before being attached to the bodice.
I also hand stitched small iridescent stars into the flounces.
I actually left the piping on the lower edge and the fastening at the back of the bodice until later. From here, I moved onto the skirt...
I created the underskirt first (using the Simplicity pattern). The side and back panels were white poly cotton and the front panel was white satin, iridescent organza and then a top layer of a thicker crystal organza. This panel needed to be less 'shiny' than the rest of the dress and the fabric used in the original dress had a 'bubble' effect pattern. This fabric would help in creating that.
Now the next part was tedious to say the least. Please, please be extremely careful if you intend to use the same technique for this next section. I had to burn holes in the top layer of fabric. I tested a few methods, one being with a soldering iron, however the fabric ended up melting to the iron and later leaving black marks. My only reliable method was by using a lighter. I used a glass surface to work on and cut off any 'brown' pieces with small thread scissors.
This was the end result:
It's a lot easier to make out the design in person.
Next was tulle...and lots of it.
I cut very long lengths and folded them in half lengthways, The edges were overlocked and pinned into place on the dummy. The tulle had to start at one side of the front panel of the underskirt and end at the other. I cut a slit down the back for getting this on and off and attached it to a waistband with ties and the back.
I spent this entire process saying 'IT MUST BE BIGGER!'.
Next was the overskirt. I cut two large sections of satin, iridescent organza and spider mesh, stitched a centre back seam (up to a certain point for getting on and off) and draped them onto the form. Once pinned and gathered, they too were added to a waistband with back ties. The front edges were all overlocked and hemmed by hand. I added a few tacking stitches in various places to creating the 'poofyness' of the skirt. When looking at reference pictures, you can see that her skirt is not straight up and down.
I left the lower hem until later, as I still hadn't decided on what shoes to wear.
My next post will look at the ruff construction and wings.
Toodles! :)


(now I'm just going through your whole process to see what you did haha)
ReplyDeleteThis is looking amazing, I LOVE the way you did the top layer of the underskirt, it looks really effective! (I drove myself insane trying to find an appropriate lace and eventually stumbled across something relatively close). It's really beautiful work!!
Thank you! <3 I was insanely lucky to actually find the fabric in my local store. If I hadn't, I would have struggled to even think of how to Google it! Haha.
Delete